Monday's video is ready. Then Tuesday arrives, and you are back inside the same recording, looking for another moment, rebuilding the captions, and checking which version has the right logo.
The footage is already there. What keeps repeating is the setup.
Batch video editing gives that work a structure. You choose several useful moments together, move through the same editing stages, and finish with a set of videos ready for the week. Each clip can tell a different story while sharing the same production process.
This guide shows how to plan that session, use Reap to prepare the clips, and take them through review and scheduling. The aim is a manageable weekly routine that helps you get more value from the recordings you already create.
Quick Answer: How Do You Batch Edit Videos for a Week of Content?
Choose your week's topics, gather the source recordings, and edit several clips in passes: selection, trimming, captions, visual styling, and final review. Then prepare the post copy and schedule the approved videos.
Start with a batch small enough to finish. Three to five clips is a practical first target for this workflow. Your recording needs to contain enough distinct ideas to support that number.
Reap can help generate candidate clips, reuse brand styling, refine edits, and schedule finished content. A single session is the production goal; upload, processing, export, and feedback can affect when the batch is ready.
What Is Batch Video Editing?
Batch video editing means preparing a group of videos through a shared sequence of tasks. Instead of finishing one post and restarting the entire process tomorrow, you make related decisions across several clips during the same production session.
For a podcast, the batch might contain five excerpts from one interview. For a business, it could combine a product demonstration, two answers to customer questions, and a founder's explanation. A course creator might prepare several short lessons from a longer workshop.
There are two useful meanings to separate:
|
Approach |
What you group together |
Example |
|---|---|---|
|
Editorial batching |
Decisions and review stages |
Choose all the week's moments, then refine all the openings |
|
Automated batch processing |
Repeated operations supported by a tool |
Generate clip candidates or schedule several selected clips together |
You can organize your editing in batches even when individual clips still need attention. Automation handles supported production tasks; your weekly plan determines which outputs are worth finishing.
Batch content creation is broader. It can include recording, scripting, designing, and writing social posts. This article concentrates on the editing stage: turning available footage into a coherent set of short videos.
Why Batch Editing Works Well for Short-Form Video
Short videos often share production decisions. You need a caption style, a frame that fits the subject, an opening title, and a clear export destination. Making those choices once gives the next clip a useful starting point.
Consider five interview excerpts. If you finish each in isolation, you may revisit the caption font five times and discover a misspelled guest name only after several exports. With a dedicated caption pass, you can check that name across the whole set before moving on.
Batching also makes repetition easier to notice. Two clips may each sound strong on their own but give almost the same advice. Seeing them together lets you keep the clearer version and choose a different idea for the other slot.
The practical benefit is a more predictable video content workflow. You know what is selected, what needs editing, and what is ready to post. Measure the time it saves in your own process rather than planning around a promised editing speed.
What to Prepare Before Your Editing Session
Choose one audience and a clear weekly theme
Write a short brief that explains who the videos are for and what they should learn.
For example: “This week's videos help first-time podcast hosts ask better interview questions.” That brief can support several angles: preparing an opening question, following up on a vague answer, allowing a useful pause, and closing the conversation.
The theme keeps the batch connected. The individual questions give viewers a fresh reason to watch each post.
Gather source footage and reusable assets
Put the original recordings, current logo, approved visual references, and correct spellings of names in one place. Keep a simple note of promising timestamps if you marked them while recording.
Use the clean source file when possible. It gives you more freedom to adjust captions and framing than a previously published copy with graphics already burned in.
If someone else approves the videos, agree on the brief and visual style before producing the whole batch. A short review of one representative clip can prevent the same revision from appearing in every export.
Decide what a finished batch contains
A useful first target is five edited clips, five pieces of post copy, and a reviewed publishing plan. Adapt the number to your actual cadence: a three-post week can be a complete batch.
Decide the main destination first. Prepare extra formats only where you plan to use them. Every additional version creates another file to review and track.
How to Batch Edit Short-Form Videos With Reap
1. Generate candidates from your source recording
Follow Reap's clipping workflow: upload a video or add a supported link, then select Get Clips to open the setup screen.
Choose the language, orientation, resolution, caption style or brand template, and target clip length. Use Processing Time Frame to focus on a relevant section and Clip Topics to guide selection toward your weekly theme. Select Get Clips again to start processing.
For the podcast-interview example, topics such as “follow-up questions, guest preparation, interview mistakes” give the selection a direction. Choose candidates based on the actual answers in the recording.
If your batch draws from several recordings, work through the relevant projects and bring the selected moments into one planning sheet. The sheet is your overview of the week's output.
2. Select the whole batch before detailed editing
Watch the candidates and write a one-sentence description of each. If two descriptions say the same thing, decide whether both deserve a place in the week.
Use three questions to make the selection:
- Can a new viewer understand the subject without watching the full recording?
- Does the clip deliver a complete answer, example, or story?
- Does it contribute something different from the other selected clips?
Keep promising alternatives in reserve. If an edit turns out to need too much explanation, you can replace it without restarting the search.
This is the point to settle the batch's content. Detailed styling is easier once you know which clips you intend to finish.
3. Refine openings and endings in one pass
Reap's transcript-based editor includes controls for setting start and end points, correcting words, and removing unwanted video sections. Open each selected clip and refine the cut.
Start where the subject becomes clear. A speaker saying “That changed everything” may need the preceding question. A direct explanation may work immediately.
Then listen to the ending. Keep the example or qualification that completes the advice. If the recording says an approach worked for a particular team, retain that context.
Review all the clips for these same qualities before adding decorative elements. It is easier to compare five openings when the question in your mind stays consistent: does the viewer understand why this moment matters?
4. Apply a consistent visual style
Reap's Brand Templates save reusable styling, including caption fonts, colors, animation, and positioning. Choose the appropriate template for the project and refine individual clips where necessary.
For a first batch, establish a small set of decisions: one caption treatment, one approach to opening text, and a consistent logo position if you use one. Test that style on a representative clip before applying the same approach throughout the session.
Consistency should make the videos feel connected. It still leaves room for different speakers, examples, and compositions. A demonstration may need the product to dominate the frame, while an interview answer needs a comfortable view of the speaker.
5. Review captions and framing across the set
Reap's caption tools support generated captions, style changes, and word corrections. Use this pass to check the names, terminology, and numbers that recur across your batch.
Read the text while listening. Then watch with the sound off. Look for a sentence that disappears before you can comfortably read it, an awkward line break, or text covering something the viewer needs to see.
For framing, check the entire clip. A good opening crop can become uncomfortable when a speaker leans forward or a second person starts talking. In a screen demonstration, make sure the relevant interface remains legible.
When you spot a recurring issue, add it to the batch checklist. A guest's name or product term is easier to catch systematically than to remember separately for every video.
6. Prepare the post copy and final files
Write each post's title and description after the edit is settled. They should match the point the video actually makes.
A useful title for an interview tip might be “A better follow-up question for vague answers.” The accompanying post could ask viewers which interview question has led to their best conversation. Both connect to the same moment without repeating the full transcript.
Keep filenames readable. For example, interview-042-follow-up-vertical-v01.mp4 identifies the source, topic, format, and version. Mark the approved version in your planning sheet so a draft does not become tomorrow's upload.
Preview and export the selected clips, then watch the final files. Check picture, sound, captions, and the opening and ending together. This is the last review before the work becomes a publishing task.
7. Schedule the approved clips
For several clips from one recording, Reap's bulk scheduling flow starts with Schedule clips on the clipping page. Select the clips, continue to the scheduling details, and choose the date, time, interval, and connected platforms before completing the flow.
For individual posts, the calendar or project publishing flow lets you add post copy, choose the destination, and set a publishing time. Use this to place clips from different projects into your weekly plan.
Reap's supported-platform guide lists YouTube, Instagram, TikTok, and LinkedIn. Check the selected account as well as the platform, especially when managing several brands.
For this workflow, finish the export review before scheduling. Reap also supports scheduling before export finishes, but its publishing documentation explains that the export must complete before the scheduled time. Direct publishing requires a finished export.
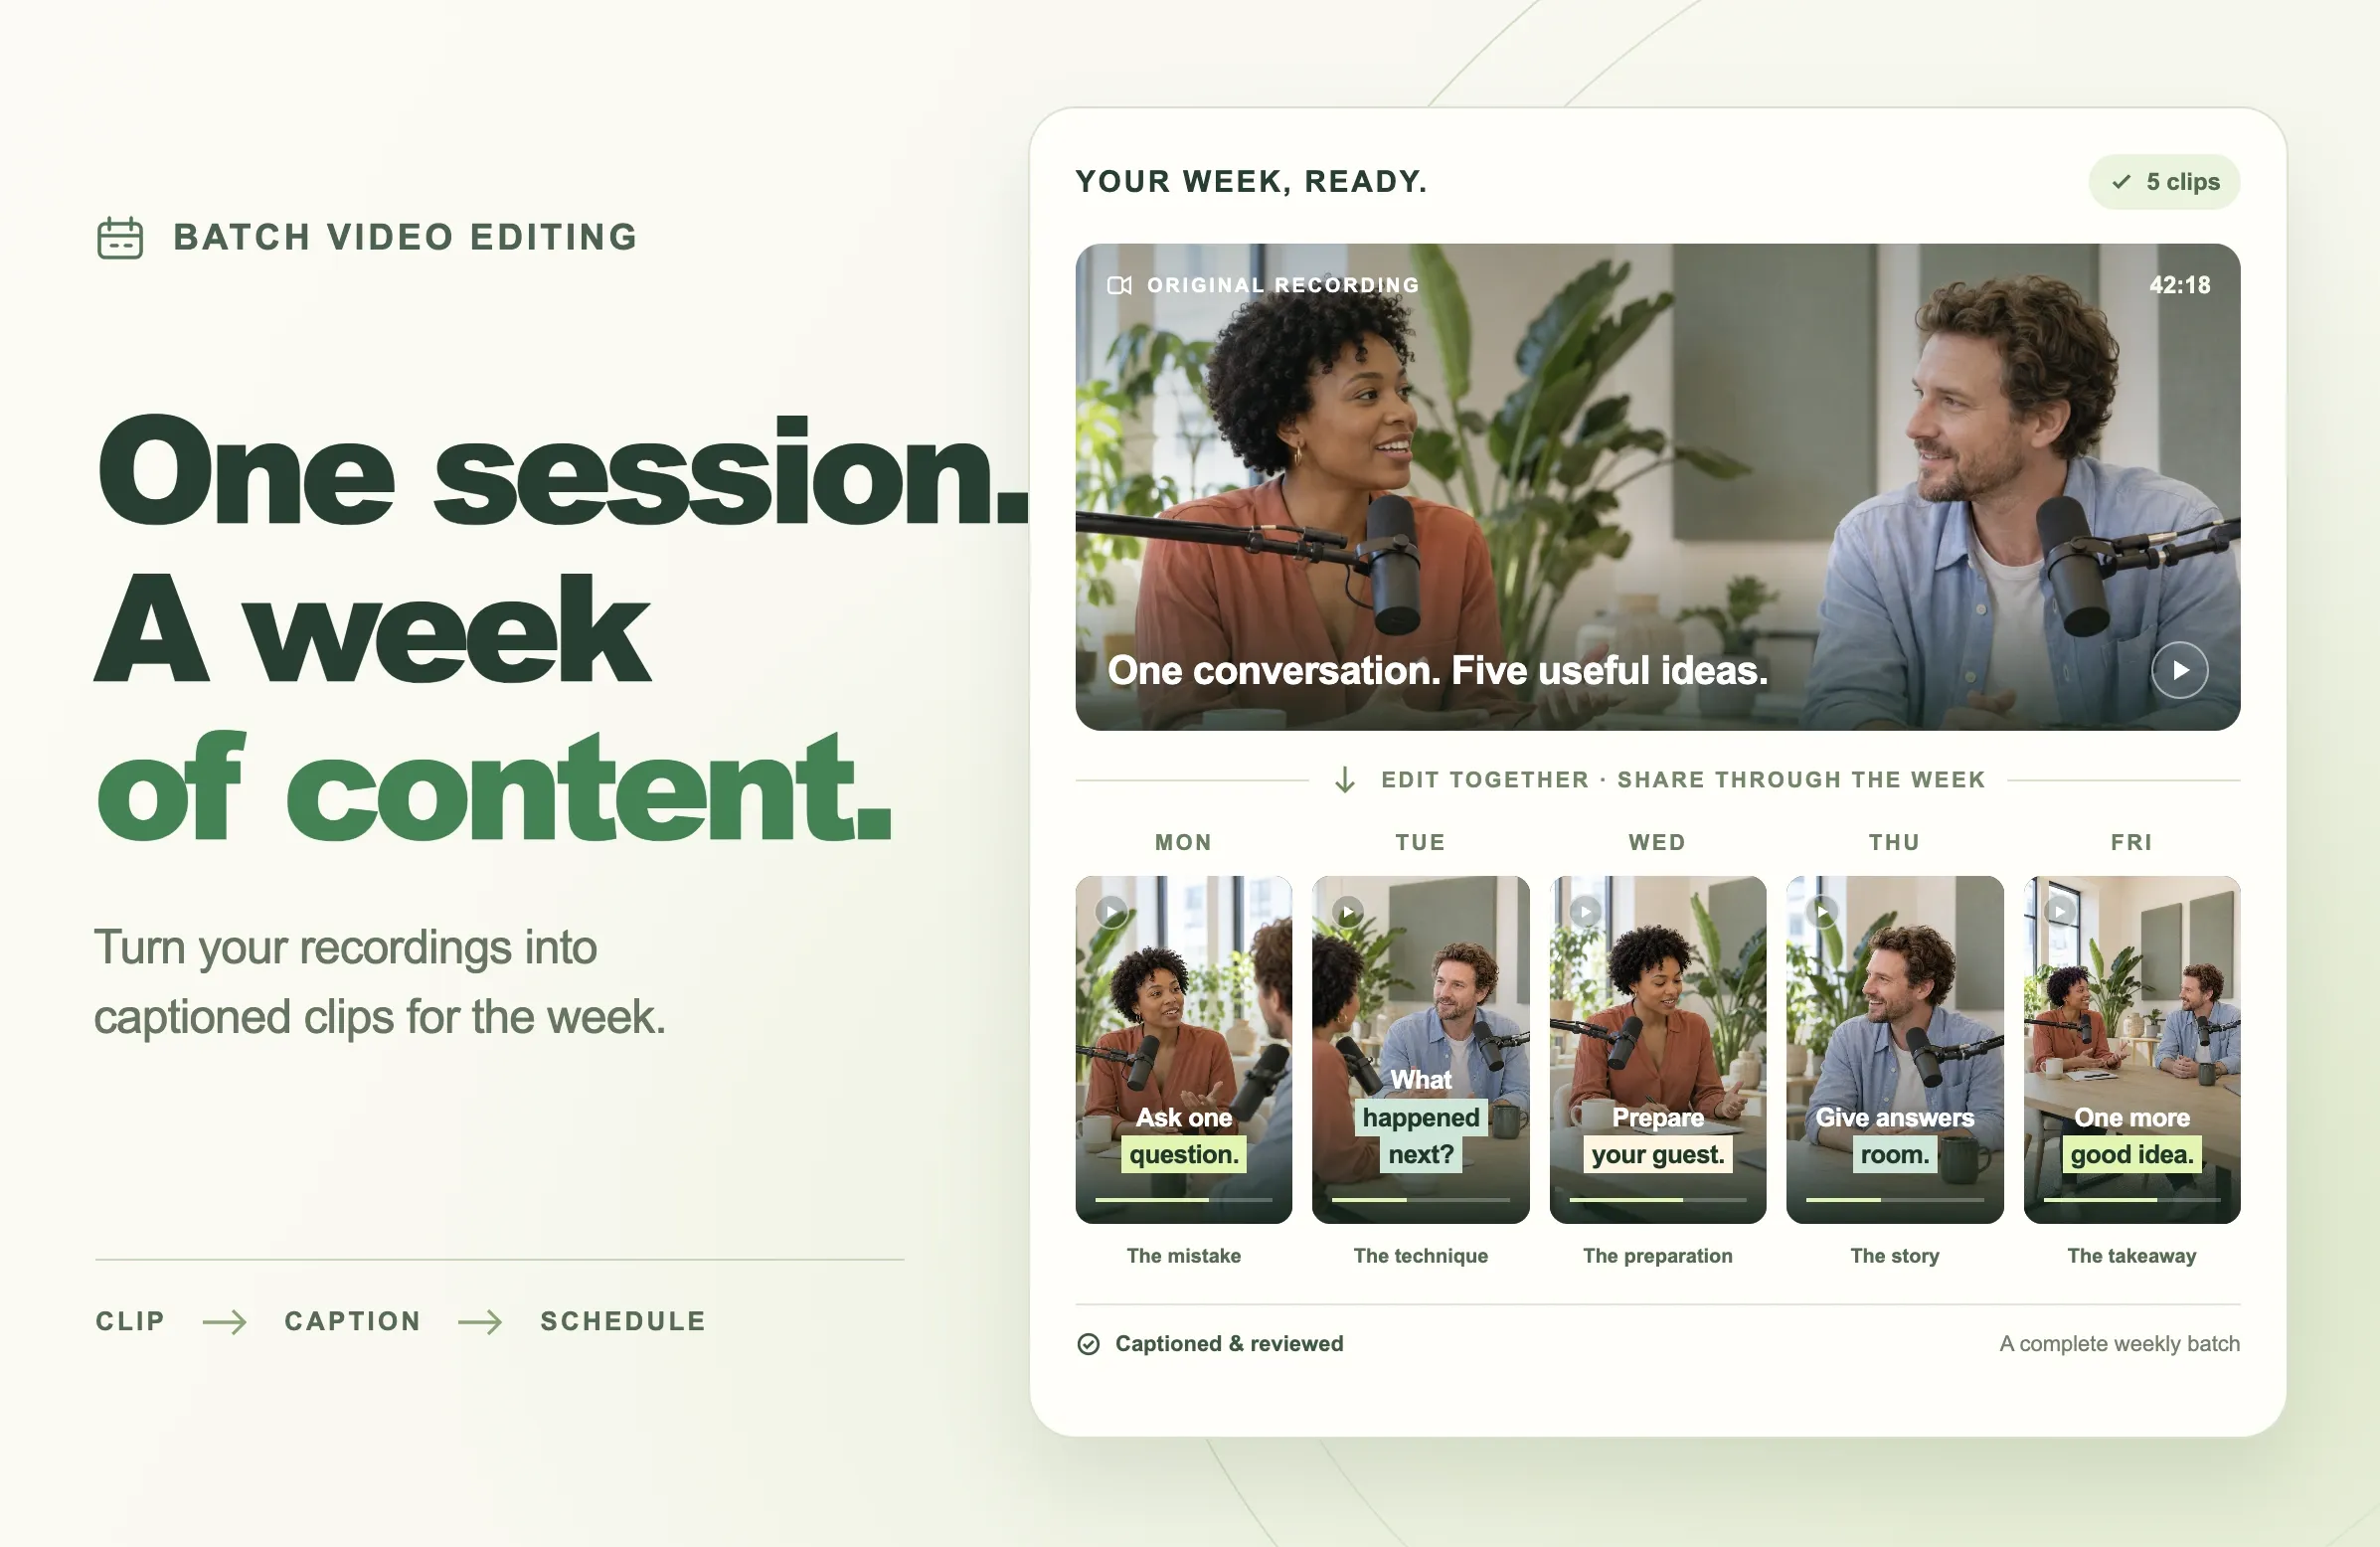
Example: One Interview, Five Different Posts
Imagine you have recorded a conversation with an experienced podcast host. The episode includes advice on preparing guests, asking follow-up questions, and keeping an interview natural.
The following is an illustrative weekly plan. Five clips is an editorial target for this example, not a guaranteed output from every recording.
|
Slot |
Clip angle |
What the excerpt delivers |
Example opening title |
|---|---|---|---|
|
Monday |
A common mistake |
Why a long question can leave the guest unsure what to answer |
Ask one question at a time |
|
Tuesday |
A practical technique |
A specific follow-up that turns a general answer into an example |
Ask what happened next |
|
Wednesday |
A preparation lesson |
What the host shares with guests before recording |
Prepare the guest, keep the conversation natural |
|
Thursday |
A short story |
A moment when leaving a pause led to a more thoughtful response |
Give the answer room |
|
Friday |
A closing tip |
A final question that helps surface something the host missed |
Leave space for one more idea |
Each post stands alone. Someone encountering Friday's clip first can still use the advice. The common theme makes the week recognizable without requiring viewers to follow a sequence.
During selection, you might find three candidates about follow-up questions. Keep the clearest one for Tuesday and look elsewhere in the interview for Wednesday's topic. That is how batch review creates variety from a single source.
If the episode only provides three strong excerpts, build a three-post plan or add another recording. You can also save an unused angle for a future interview question.
A Simple Tracker for Your Weekly Video Batch
Use a sheet or the planning tool your team already opens every day. Give each clip one row and keep the fields specific enough that another person can understand its status.
|
Field |
What to record |
|---|---|
|
Source and timestamp |
The recording and passage the clip came from |
|
Main idea |
The single point the viewer should understand |
|
Destination |
Platform and account |
|
Edit status |
Selected, editing, review, approved, or scheduled |
|
Final file or project |
A link to the correct version |
|
Post copy |
The title, description, and relevant next step |
|
Publishing slot |
Date, time, and intended time zone |
|
Reviewer |
The person responsible for final approval |
Keep “approved” and “scheduled” as separate statuses. One means the video is ready to use; the other means it has a publishing slot. A quick check of both helps prevent finished work from sitting unnoticed in a folder.
For a solo creator, the reviewer may simply be you returning for a final watch after completing the editing passes. For an agency, attach feedback to the specific clip and version so changes remain easy to follow.
Common Batch Video Editing Mistakes to Avoid
Polishing the first clip before choosing the rest
It is easy to spend the session perfecting one title animation. Choose the full set first, then establish the shared visual treatment. You will know how much work remains and which decisions can be reused.
Making every clip tell the same story
A matching style helps recognition; repeating the same takeaway gives the audience less to discover. Review the one-sentence descriptions together and make sure each clip earns its place.
Adding too many versions too early
Five clips across several formats and languages can quickly become a larger project than intended. Finish the main batch first, then create the additional versions your distribution plan requires. Each version still deserves a review.
Treating a saved template as the final check
A template provides a starting point. A new background can reduce contrast, and a demonstration can place essential details where captions normally sit. Check the actual footage after styling.
Scheduling before the correct person has reviewed the batch
Make approval part of the production session. When feedback is required, give the reviewer the final candidates, post copy, and intended dates together. That makes it easier to assess the week's content as a whole.
How to Improve the Next Batch
Track production and audience response separately. Production notes show where editing gets stuck; audience results help you decide which subjects and presentations deserve another attempt.
For production, record the time spent selecting, editing, reviewing, and preparing posts. Note how many selected clips became approved exports. If caption corrections dominate, maintain a short list of recurring names and terminology. If selection takes longest, mark promising moments while recording the next episode.
For audience response, compare clips over similar observation periods using the metrics available on each platform. Look at viewing behavior, relevant comments, saves, and actions connected to your goal. Keep the results separated by platform because metric definitions can differ.
Choose one change for the next session: a clearer opening, a more specific example, or a simpler caption treatment. This gives you something concrete to evaluate while keeping the weekly process manageable.
For a workflow focused specifically on YouTube, our guide to automating Shorts creation goes further into that production use case.
Final Thoughts
A weekly batch turns a collection of recordings into a clear production plan. Choose the ideas together, work through focused editing passes, and finish with videos you have reviewed and know where to publish.
Start with one recording and a manageable set of clips. Reuse what should stay consistent, give each post a distinct purpose, and let the next batch benefit from what you learned.
Start your next video batch with Reap to generate clip candidates, refine their captions and presentation, and prepare your content for the week.